There are new people joining the world of wildlife photography every day. Sometimes it is easy for those who have been doing it for a while, to forget that those new photographers first need to learn the basics. The article below concerns itself with the basics. There is more to wildlife photography than exposure, focus and shoot, although there are times when due to fast breaking action, that is what even the best wildlife photographers will do.
I chose the pictures below for this exercise because I had enough time to think about depth of field and point of focus before I made them. The first five pictures were made at a local zoo, and the final three subjects are in the wild. I have included info on why I did what I did. They are merely “tools” for your personal use.
Where we place our focus when photographing animals, and how far we stretch that focus, or depth of field, makes a great difference in the acceptability of our finished product. Today’s capability to run high ISO numbers, and therefore to be able to use more depth of field, makes your ability to create images of wildlife in total focus, much more likely. Just the same some of the same problems do exist.
When you are limited in the total area that you captured in focus, due to shallow depth of field, even with today’ best auto focus, it is easy to miss the right spot to place that focus. If you have multi segmented auto focus, moving the focus to the correct spot to work with your composition is imperative.
Shoot for the eyes. I think all wildlife photographers who have spent any amount of time examining pictures, or making their own, know that first and foremost you want those windows to the soul to be sharp.
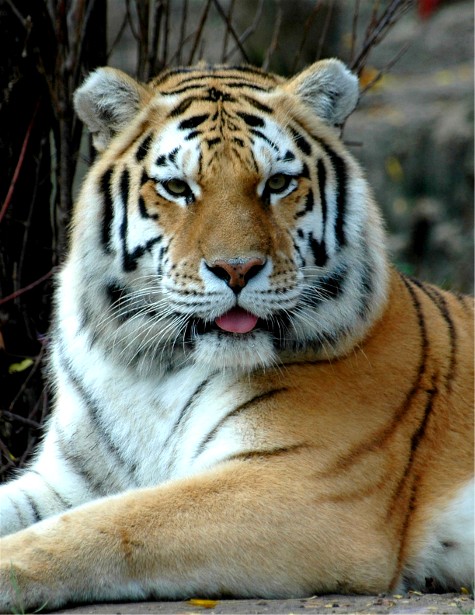
The Tiger images below were made with a zoom lens set at 270mm and 300mm respectively. I used an f stop of 5.6 in both occasions. I did use auto focus. With my cameras at that time, I focused on the eyes, pressed and held the hold focus button, and recomposed and shot.
This first image is a crop from an image that was made at the same location/distance as the second one. I intended this to be cropped when I clicked the shutter. I shot for the eyes. If you look careful you can see most of this critter is soft and out of focus. It only works because the eyes are sharp. Knowing my depth of field would be shallow I focused right in front of the eyes. I wanted everything from the eyes forward towards us the viewer to be in focus. A soft and fuzzy nose usually only works in super close images that are all about the eyes, or more distant pictures.
This second shot is the same depth of field and once again I shot for the eyes. If I had missed those eyes it would have been less obnoxious than I had missed them in the close-up, because the viewer first looks at the whole Tiger, not the eyes. you can howeevr see that most of the Tiger is out of my focus range.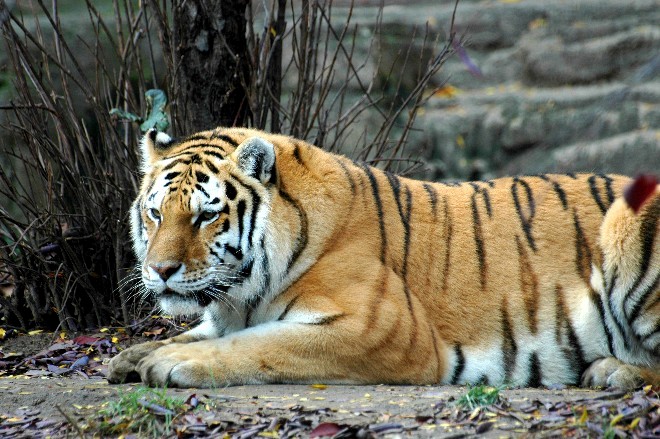
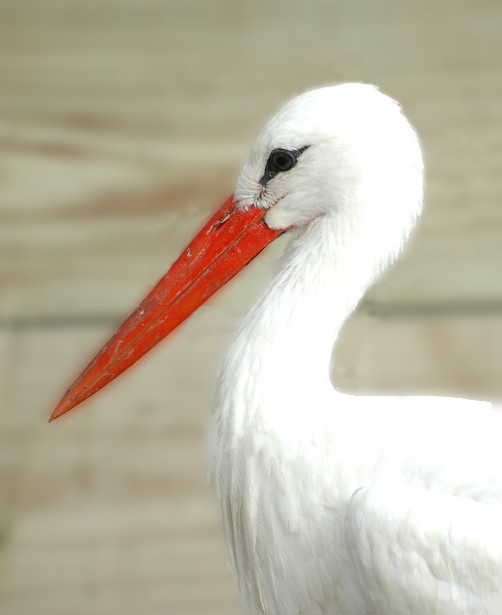
I also made this picture of an African Stork with f stop of 5.6 and 300mm. This bird is parallel to my camera so 5.6 was plenty of depth of field to cover the entire animal. In other words every part of this bird is at the same distance from my camera lens. I believe I could have shot at f 4, but I was concerned that the bird would move a portion of its body just a little. Why would I want to shoot at f 4? There is a wooden sided building in the background. While 5.6 helped keep it somewhat out of focus, f 4 would have been better. The second stork image is the same picture as the first. I have used the Gaussian Blur feature of Photoshop to soften the background. It does look better. Please excuse the soft halo that surrounds the bird in the second photo. That is from the editing blur that I used. It bleeds some of the bird’s body into the background. I began removing it via cloning but decided to leave the rest of it in. I did so to see if you would notice it, and as a warning of what will happen without taking care. I have not used this blurring device in about five years. I am not a fan of over editing pictures. I am a true believer of doing everything you can “in camera” at the moment of conception.
This picture of a Meercat brings a similar set of issues? It was shot at 190mm with an f stop of f 8. I wanted as much of the body in focus as possible. I did not mind having some detail in the background, because that is in fact, pretty much a natural background for a Meercat. While I could have lived with an even sharper background, I would have actually preferred one that was softer. That former choice would have put even more of an emphasis on the background, which I could have lived with, and the latter choice would have featured the animal even more, which would have been perfect.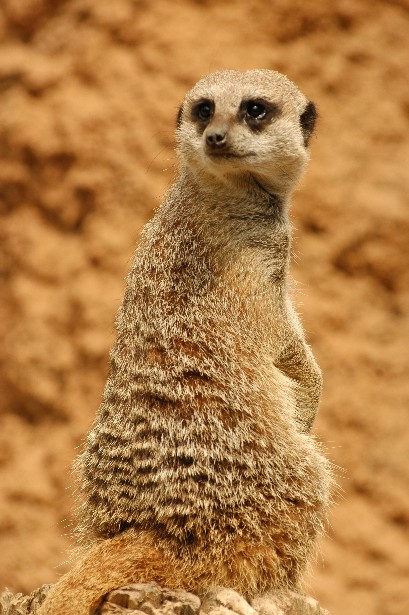
This picture of a Swainson’s Hawk was made in the wild. I hate out of focus foliage in front of my subject. Sometimes there is no other way. If there is a lot of that foliage as in this picture, it is all about keeping it out of focus. The other thing that can make it acceptable is if your subject, has its body or at least its face, clear of that foliage. One or two obnoxious plants would have been more bothersome than this entire bunch, although I may have cloned them out. I used my 500mm lens at f 4. I used shallow dof to make sure to keep that foliage soft and unobtrusive, but I took care that my focus on the hawk was accurate. The other possibility would be to keep the plants tack sharp. That can really work and it is a good way to show habitat in a wildlife image. The problem is that with my 500mm lens, even f 22, would not show those plants as tack sharp. Of course my shutter speed would have been too slow for even a quiet subject. I made this image in 2007 with the limitations of the cameras of that time.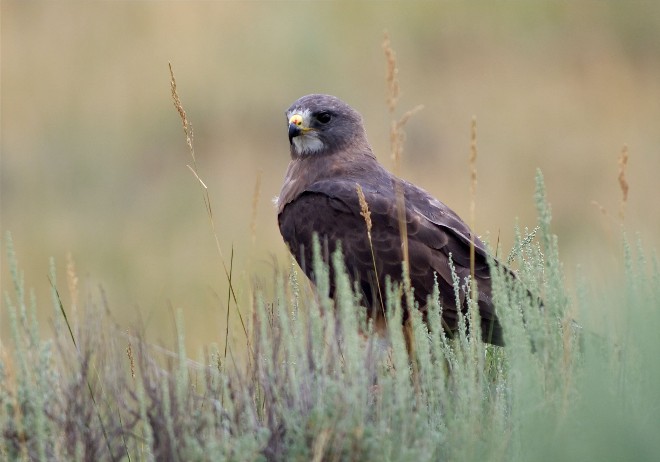
Multiple subjects. Depth of field becomes an issue when you are attempting to cover two animals in the same frame. In my opinion, the best two options are to either get both animals sharp, or have the second subject completely out of focus. I used an f stop of f 10 to cover both White-tailed Prairie Dogs. They were only slightly askew or more depth of field would have been needed. The critter on our right, is a bit closer to us than the other.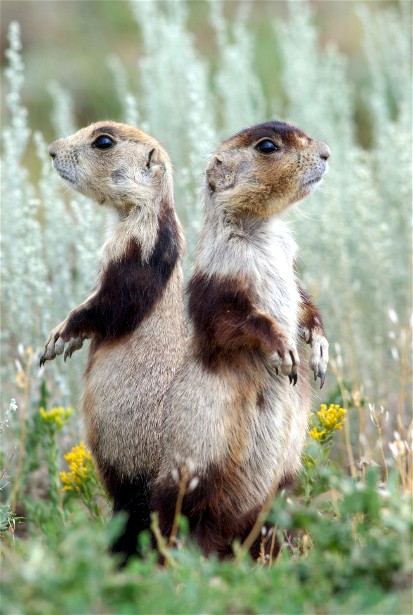
I didn’t need a lot of depth of field for this foursome of young Great-blue Heron siblings. Just the same the bird on the far right is a little farther away than the two on the left, and the bird next to that one is clearly behind all of them. F 7.1 did the trick. I used my dof preview lever when I was photographing this nest.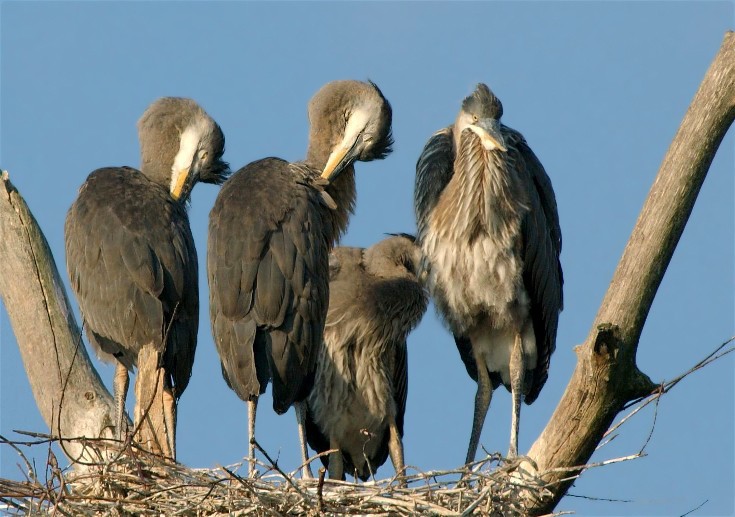
Remember that when you are viewing your subjects through a long lens, it will visually compress your subjects and you can be misled as to the distance between those subjects. Use your dof preview lever when in doubt.
Point of focus and depth of field are becoming something that most wildlife photographers seem to try to maximize all of the time. In other words they want every inch of the subject covered in focus. Creative choices abound and minimizing your dof can be just as valid of a choice. Creative thinking about the little things doesn’t just apply to macro work or landscapes.
=================================================================
As nature photography increasingly becomes a hobby/experience/business for the masses, there seems to be as much lost as there is being gained. Easier and easier ways to create the perfect picture are advanced every day, making it more appealing to more people. The photographer has become the photographer (s) as this is now more of a social experience, much like running a marathon, playing soccer or meeting at the corner bar. While virtually all of the great nature photographers of the 1960s-1990s, enjoyed some quality time in the field with friends, each and everyone understood the value of studying and experiencing nature alone. It is the one way you can truly understand the emotional benefits of what you do. It is also the only way you will ever notice all the subtle nuances of the “art of nature”
Perfection comes from the whole experience, not only the image made.
Have a great day, Wayne
