For many years the most asked question by aspiring photographers was, how do you get a proper exposure. Back a few years those who were shooting color negatives, were not as much concerned, because in a limited fashion, whomever was printing the negatives could adjust, but serious image makers eventually shot slides with almost no exposure latitude, and exposure, exposure, exposure became the mystery of all newer photographers.
Digital image making allowed us to first review our exposure mistakes on the back of our cameras, and adjust for minor errors, and then adjust large errors once we got home and began the editing process with our software programs.
Through most of my film years, I carried with me both a hand held 1% spot reflective meter, and a hand held incident meter. The reflective meter became obsolete with my 35mm cameras when they began to include internal 1% meters that were very good. I continued to use my 1% hand held when necessary for my larger format cameras. I still continued to carry my hand held incident meter, for use in a lot of my landscape work. Landscapes where most of the scene in one light. Those incident meters gave you an exposure for the light that was falling on your subject or scene, instead of the light that was being reflected back from it.
When I began to teach workshops in the digital era, I still attempted to teach all of the principals of exposure, rather than “only” explain how to make the camera do the job for you. Light is the essence of all photography, and it pays to understand the roots of everything you do as it concerns exposure.
Our eyes have more latitude than a frame of film, and even more than a digital file. Our eyes connect to our brains to allow us to balance a scene for the bright highlights, or to see into the shadows when we desire.
A scene that is photographed while looking directly at the rising sun, can be corrected with our eyes/brain. Our choices decide whether the resulting picture is a colorful sky with black silhouettes, or a less colorful sky but a foreground with details.
The differences between those areas of light and dark, can be kept manageable and in synch by using graduated neutral density filters in an effort to hold back the bright areas of the scene, and also with HDR imaging. By making multiple images, some favoring the bright areas, some the dark, we can combine those pictures with HDR software and provide a better balance. Beware, that sandwiching several images in that fashion can lead to over saturated and sometimes unrealistic colors. Remember, that your exposure alters the color of objects. Therefore, when you lay a digital file of one exposure over a file of another, you are combining several different colors. The results of combining different colors can be unpredictable.
My creative side has always pushed my eye/brain connection, to deliver to me not only what they see, but what my imagination sees as well. I have often pushed the envelope of camera/meter exposure to see what my brain, my eyes, and what the creative side of my imagination (right brain) both sees and feels.
I think you can say that most of the photos I have made, contain an exposure that is proper by our “normal” standards. Certainly the majority of my wildlife pictures have that element to them. With that said, some of my images are at the edge of reality. I mean, I see that sunset light as colorful and moody, but my vision takes me on a journey that covers several gradations of light until we finally arrive in darkness. Any image that takes us on a journey has at least some merit.
Color changes with both light and exposure. Warm light creates a bias on your subject that is warm. Simple. Shooting in the shadows, while a sky full of blue light reflects into those shadows, cools your subject and alters the perceived color. How you expose that subject, light or dark, can also the perceived color.
I am not a surrealist. I deal with reality first. Just the same, my brain (and yours) is flexible enough to combine the tools we call eyes, to see a little beyond our normal reality. Knowing how to recapture that reality is the true essence of being a story teller with a camera. All stories are not those of direct reporting. Direct reporting is the job of the news media, and they seem incapable of doing it. Telling the truth with a camera, not through the eyes the masses, but through our eyes, is the interpretive right of photographers unless he/she is “reporting” for those who have the pretense of giving accurate information to the public.
I love pure silhouettes. The simplicity, elegance, and the art of color and form, can be powerful.
I expose a scene like this at its brightest points. That will take the darkest areas and reduce them to shape and form. It can render the overall sky darker than reality. If that’s not your preference, take your meter reading of a mid toned area instead. Then when you get home, add some contrast to the whole image in order to darken the portion to silhouette, and lighten the sky.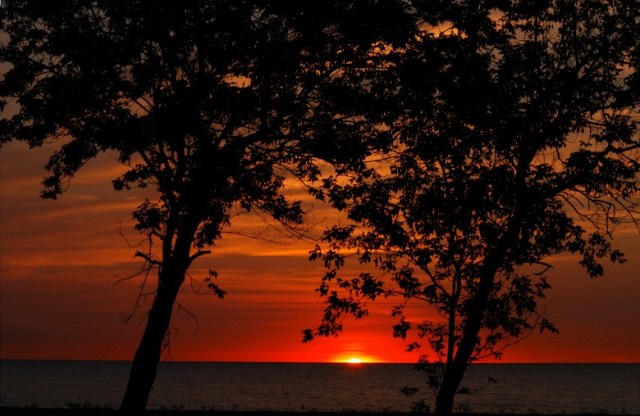
If the rising sun skims all or a portion of the foreground, you will “naturally” hold some detail, or at least some reflected light, in the foreground.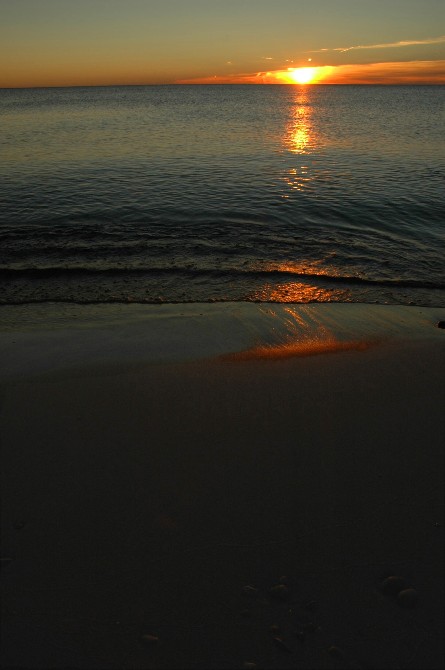
I did use a 2 stop graduated neutral density filter to hold the sun back a bit with this one. I wanted to show a little bit of wave action.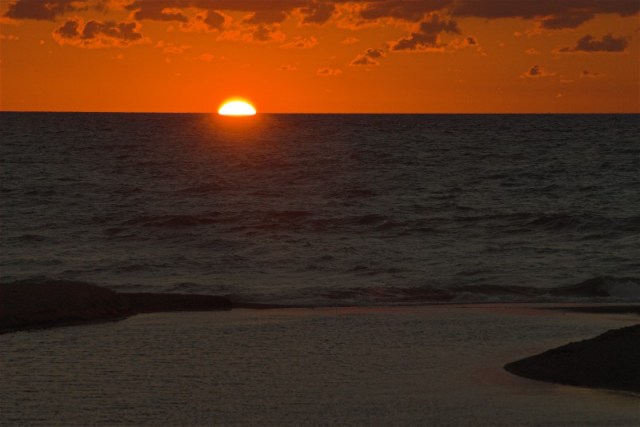
I truly enjoy low light pictures, when the light is, well, really, really low. Once again we have a bit of light skimming the surface of the sand at White Sands New Mexico. The color of light here is outrageous, and the amount is just enough to know that the subject is sand.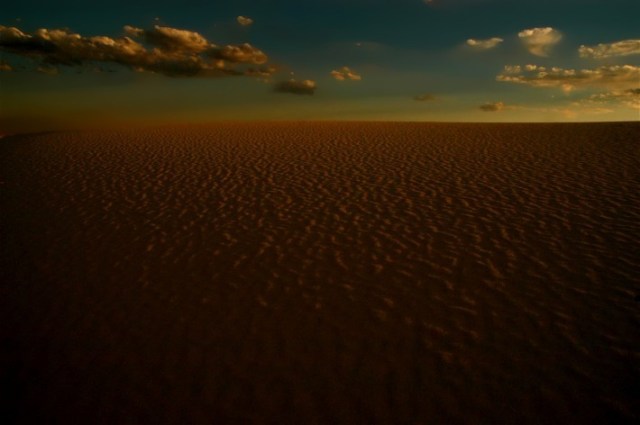
This White Sands Picture was actually created earlier in the day. Underexposure here was intentional. It reduced the distant mountains to a silhouette, and accentuated the “god beams” effect in the clouds.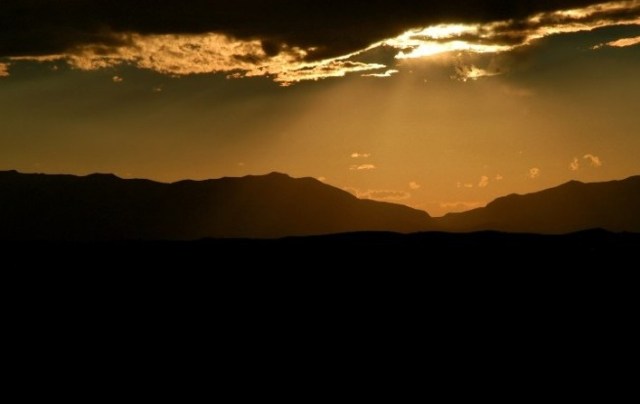
I intentionally took my meter reading from the brightest highlights of the lake with this shot. The last thing I was interested in was a 100% realistic view of this sailboat on Lake Michigan. That creative choice left the lake a series of dancing highlights, while still exposing details in the white sail.
The creative decision to “somewhat” abandon reality in this image really needs no explanation because this is not how we see. Or do we? The truth is that I squinted my way to what you see here just before I made the exposure choice that brought it to fruition.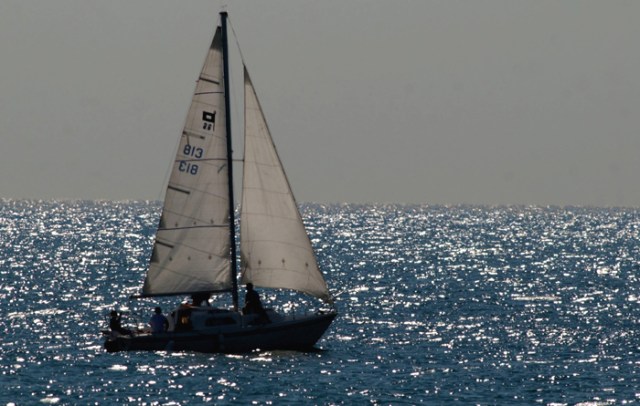
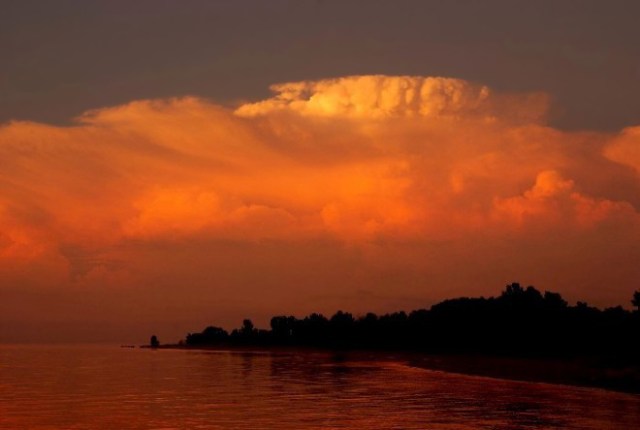
Some contrasty scenes can be made to be revealing even though you are exposing from the bright highlights. If that brightness is bouncing back into the shadows, revealing enough detail, then nature has given you a gift. I like these sorts of images because they show both the color of light, and details revealed by the reflection of that light.
More Color of Light
For me, the color of light is one of the most powerful tools in photography. Natural light, or nature’s light, is the best (my opinion) carrier of those unique qualities.
Exposure matters with the color of light. One sure way to kill the drama in the color of light, is to overexpose. Underexposure has some problems as well, as you can lose high impact detail if the light levels get too low.
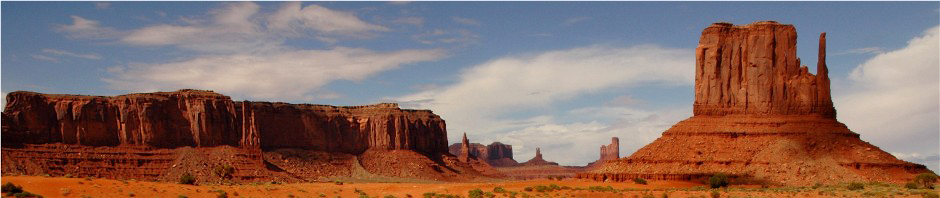
The red rock country of the high desert in the southwestern U.S. is certainly the best place in America to catch vivid colors from the rising/setting sun, on top of the already warm colors of red rock.
These first two images below were created just after sunrise in Arches N.P. Utah on film many years ago.
This first shot shows the brilliance of morning sidelight on Sandstone. It also displays the dimensional affect of placing cool (the sky) and warm colors side by side. Making this image in this light required a fast drive in the my car, and a faster hike with my camera equipment.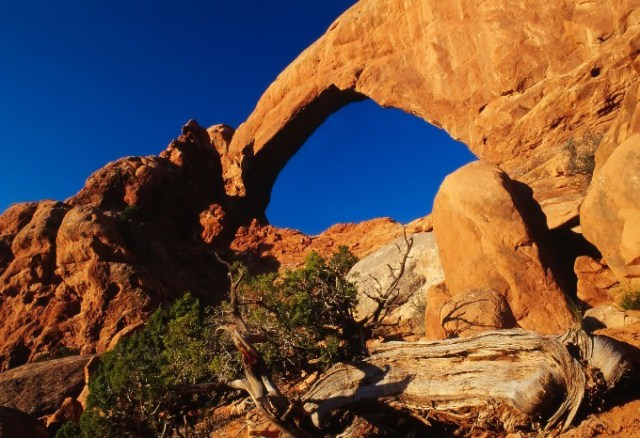
I fell in love with the dramatic shadows which were adding visual contrast to the sunrise light on Sandstone in this image. As best I can remember, I opted for a standard exposure from the sunlit portion of the arch. The shadows were already deep.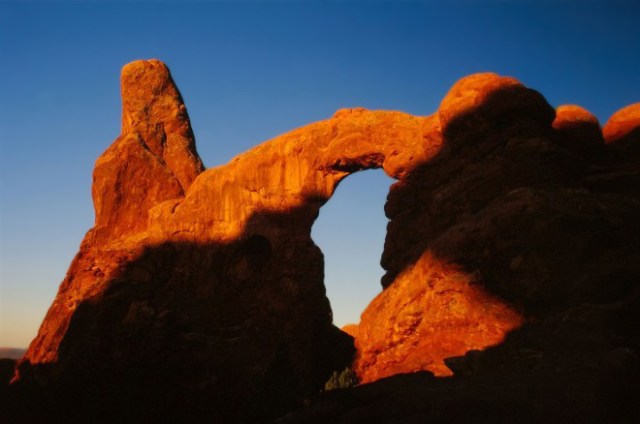
Before I made the two pictures above I created silhouette images of Balanced Rock in another part of the park, henceforth, the fast drive and hike. You can’t make the picture if you’re not there.
This is another old picture. It was made of El Capitan in Guadalupe N.P., Texas. A long drive in the dark got me here just in time to catch the mountain in alpenglow. No time to get creative, but enough time to “catch the glow”. The exposure was made (for my 6×7 Pentax) from the rock face. That was the mid toned area of the scene, in which both the sandy foreground, and the sky had different values. I have made very different sorts of images of this mountain in more recent years. Variety is the spice of life.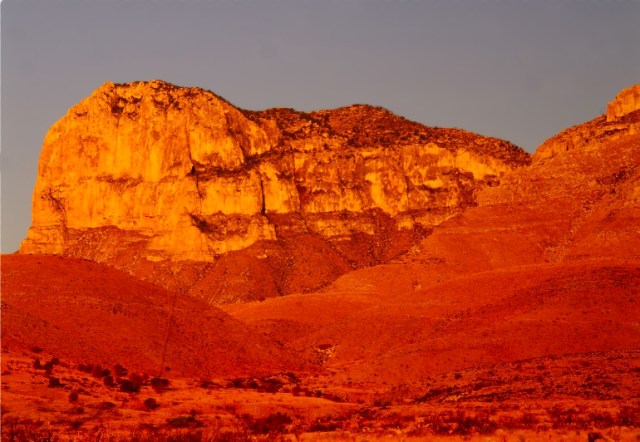
The color of light is not limited to landmarks.
I found this Bull Frog only seconds after the morning sun graced it. I know not my exposure but it would seem to me that it was a compromise between the frog and the water. That kept the frog beautiful with detail, while keeping the water a bit dark and offering some eye popping contrast.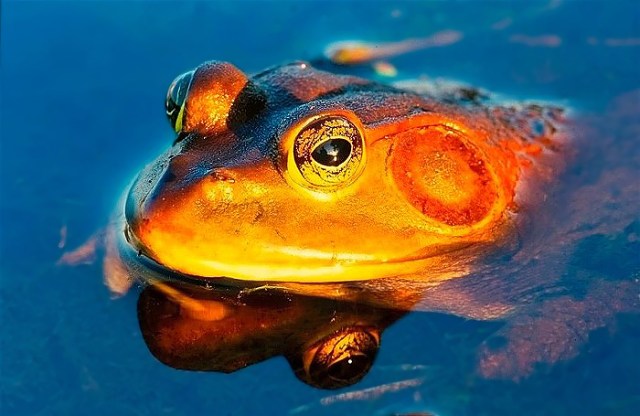
Overcast can be beautiful but many photographers ignore it. I was going to show you a bunch of flower photos here but I think a very simple inner forest landscape says it pretty well.,
Forest light can be hideously contrasty. Contrasts can work well, but only if the highlights are under control. A gentle waterfall traveling on its journey through a forest is the perfect candidate for a low contrast image. An incident exposure which reads the light as it falls on the subject would be perfect for this, but my guess is I took a reflected reading from some areas of green that are not showing in this picture.
Wildlife & Exposure, With & Without Contrast.
Exposure can be a blessing or a curse when you are photographing animals.
“Almost” front light can be perfect with animals. This little Plover posed nicely as the light came in just a bit to our left. My camera meter was likely set at Aperture Priority, minus 1/3rd of a stop.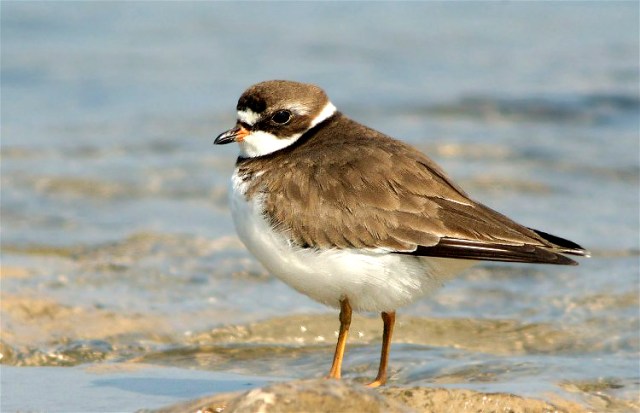
This Gosling is bathed in moderate sidelight. Moderate enough that there is plenty of detail everywhere, but it is enough from the left side of the bird, that it helps provide texture. Remember, sidelight creates small, almost unnoticeable shadows which in turn create texture and a feeling of dimension.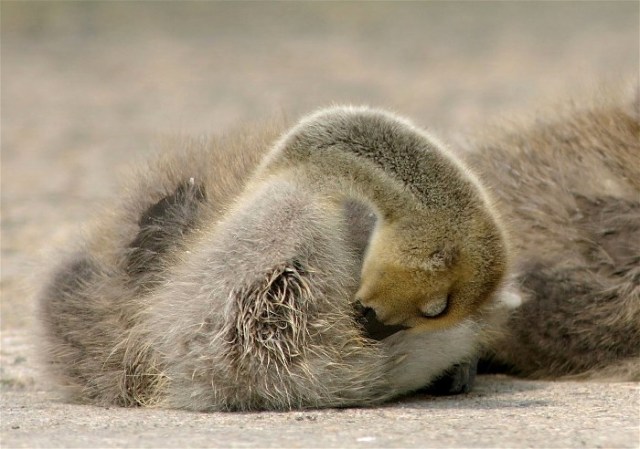
The sidelight gets a little more extreme and from the right with this foraging shorebird, but the only place it lacks detail is in the head, and it is mostly under water.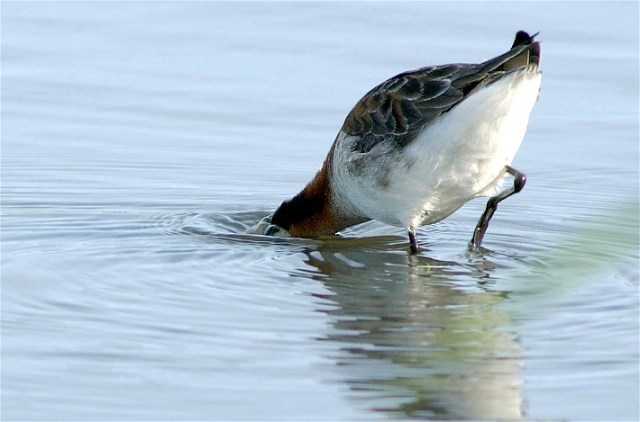
This mix of sunlight and shadows is very usable. The sun (and the shadows) seems to hit this male Common Goldeneye just right. The yellow eye and white patch on its right (shadow side) cheek, help to balance the contrast here by moving our eyes into the shadows. I am guessing that a standard exposure of aperture priority with a minus 1/3rd stop was used for this.
Extreme sidelight, especially with a black bird, can be a major issue. The saving grace of this Coot picture is the band of light that crosses the left side of its face.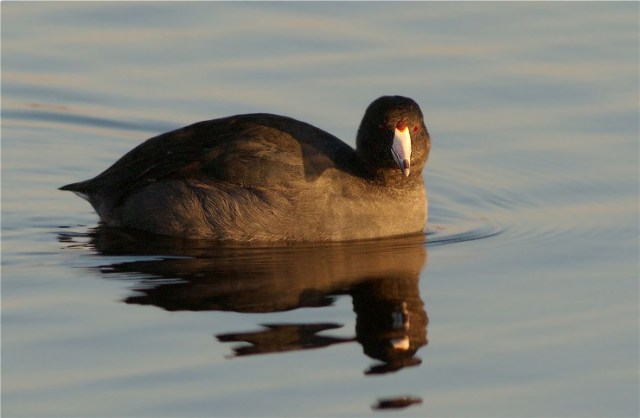
Deep shadows and bright sun in one picture frame when photographing wildlife is a nightmare, but you can bring back a little detail during the editing process. I added some small exposure to the upper shadowed area of the photo and a least it can now be showed.
High-bright overcast days in a woodland, can provide almost as much contrast issues as sunny days. I made it a point with this Great-horned Owl to expose for the owl and the tree. The bright overcast sky did not blow out because on my exposure on the bird. If it had, I would have at least attempted to reduce the sky during editing one little patch at a time, as it shows through the tree. Thankfully, it was not necessary.
I should add, that this image would have been much better if I would have backed up, and cropped more. Backing up, would put us on eye level with the bird, and as a bonus, the top areas of blank sky would be absent. Still a cool bird though! As always, I thanked him before I left. 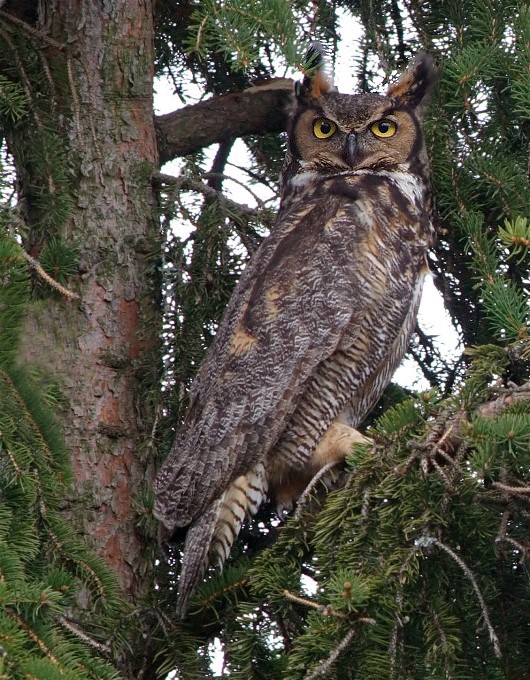
Electronic flash can be a blessing in animal photography, including with insects.
This bug was on the underside of this leaf in a very sunny area. What you see here was completely in shade. I used a dedicated electronic flash that determined exposure by balancing my intentional underexposure with that flash. The reason that the lower left side is dark, is that the nearest foliage was out of reach for the flash and of course the ambient exposure was not enough to reach it either.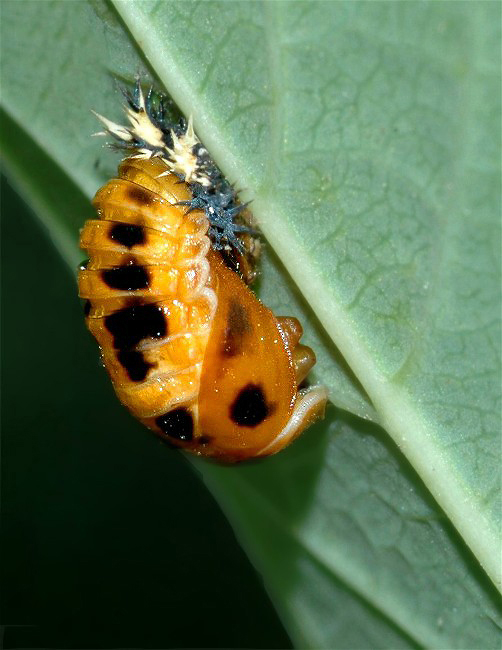
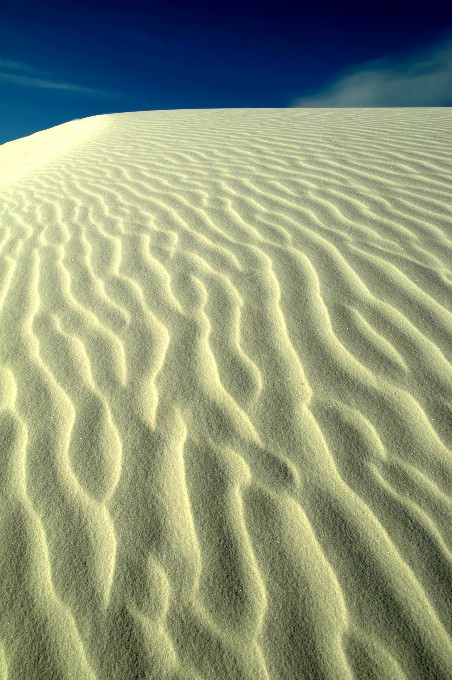
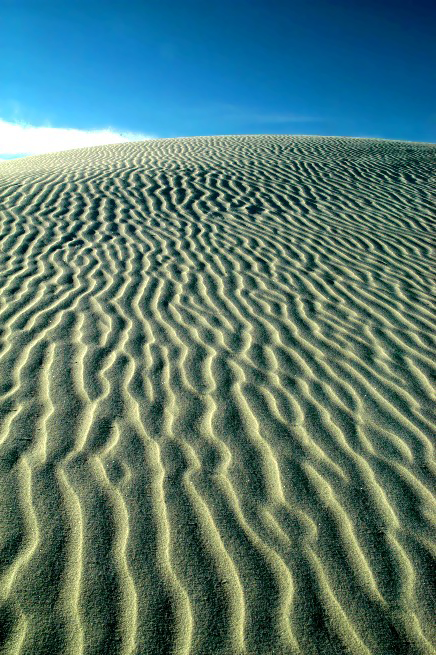
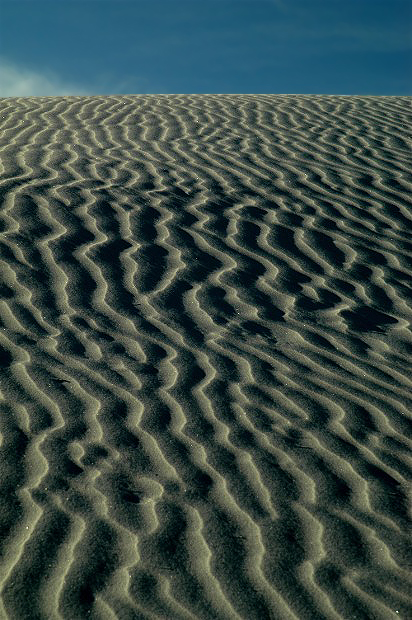
Ripples of Exposure
My last example is once again, from White Sands, New Mexico. This is a great place to practice making intentionally unique exposures.
These three pix are not of the exact same spot. but they are very close to each other. Each image was made a little later than the previous, and each one carries subsequently more sidelight. I also added a hair more contrast in the editing process. That simply helped to make the point of what was actually happening in front of my eyes. In other words, while they are honest pictures of what was before me, they have some of my interpretation as well. A bit of underexposure, increasing contrast from natural sidelight, and then adding some at home, made each shot a little more abstract than the previous one.
Exposure is not the only way to use your personal, creative vision to tell a story with a camera (composition, depth of field etc.), but it contains in it the most variations of a theme, while still remaining truthful about the actual subject in the picture frame.
God Bless, Wayne
